Octopress installation in Ubuntu 12.04 with rsync
Octopress is a blogging framework which generates your enire blog in static files. Octopress has integrated Twitter, Google Analytics, Google Plus, Facebook and some other webservices. There are also good plugins for adding images, code, videos and other content into your blog posts. The framework is made for hackers and people who know something about Linux and shell.
Requirements for this tutorial
- Linux knowledge
- Preconfigured webserver using Apache and home directories
- Ubuntu 12.04 installation on your PC
This tutorial will be about the installation of blogging framework Octopress. As I have tested the installation process is not so simple for beginners as it is described in the official website.
There are three official ways to deploy Octopress
- Github Pages
- Heroku
- Rsync
In this tutorial I will be focusing to basic installation of Octopress and the Rsync deployement.
Here are the installation steps:
Octopress installation #
Ubuntu 12.04 #
Fresh Ubuntu installation will need the following packages to be installed.
sudo apt\-get install bash curl git\-core \-y
sudo apt\-get install build\-essential bison openssl libreadline6 libreadline6\-dev zlib1g zlib1g\-dev libssl\-dev libyaml\-dev libsqlite3\-0 libsqlite3\-dev sqlite3 libxml2\-dev libxslt\-dev autoconf libc6\-dev ncurses\-dev automake \-y
RVM #
We will be using RVM for controlling installation of Ruby and dependencies required by Octopress. Install RVM to your user profile with next command.
curl \-L https://get.rvm.io | bash -s stable --ruby
source .bashrc
As we now have enabled Ruby environment on our system, we will need to install some packages to prepare it for Octopress.
rvm install 1.9.3
rvm use 1.9.3 \--default
rvm reload
rvm rubygems latest
gem install bundler
Cloning Octopress from Github #
Now it’s time to clone Octopress to our home directory.
git clone git://github.com/imathis/octopress.git octopress
After the clone is complete move to Octopress folder
cd octopress/
You will get a notification from RVM asking do you trust new .rvmc file. Answer yes.
\===\===\===\===\===\===\===\===\===\===\===\===\===\===\===\===\===\===\===\===\===\===\===\===\===\===
\= NOTICE                                                                     \=
\===\===\===\===\===\===\===\===\===\===\===\===\===\===\===\===\===\===\===\===\===\===\===\===\===\===
\= RVM has encountered a new or modified .rvmrc file in the current directory \=
\= This is a shell script and therefore may contain any shell commands.       \=
\=                                                                            \=
\= Examine the contents of this file carefully to be sure the contents are    \=
\= safe before trusting it! ( Choose v\[iew\] below to view the contents )      \=
\===\===\===\===\===\===\===\===\===\===\===\===\===\===\===\===\===\===\===\===\===\===\===\===\===\===
Do you wish to trust this .rvmrc file? (/home/lennu/octopress/.rvmrc)
y\[es\], n\[o\], v\[iew\], c\[ancel\]\> yes
Installation of Octopress RVM Packages #
Insert the following commands in Octopress folder to install it.
bundle install
bundle update
rake install
If you get the following error:
rake aborted!
You have already activated rake 0.9.2.2, but your Gemfile requires rake 0.9.2. Using bundle exec may solve this.
Solution to this is to update bundle version.
bundle update
rake install
Congratulations! You have succesfully installed Octopress to your Ubuntu.
Rsync deployement #
In order to publish your Octopress blog into your own webserver, you have to send the public files to the server. In this tutorial I assume you have setup the normal user account web publishing configurations.
Here are the steps how to use Rsync to publish your website:
Server modifications #
We will start by creating an account to the server.
Login to your server and use sudo adduser command to add the user.
We also need to install rsync with the following command.
sudo apt\-get install rsync
After this you can logout from your server.
Setting up public key authorization between Ubuntu and Server #
First we create a public key with the following commands.
ssh\-keygen
You will be asked where to save the key. Save the key to the default directory by pressing Enter.
Generating public/private rsa key pair.
Enter file in which to save the key (/home/lennu/.ssh/id\_rsa):
Insert a passphrase for two times and the key will be created.
Created directory '/home/lennu/.ssh'.
Enter passphrase (empty for no passphrase):
Enter same passphrase again:
Your identification has been saved in /home/lennu/.ssh/id\_rsa.
Your public key has been saved in /home/lennu/.ssh/id\_rsa.pub.
Now we need to send the public key to the server, specifically in your just created users’ home directory.
We can use ssh to send the file to your server.
cat .ssh/id\_rsa.pub | ssh username@server "mkdir .ssh;cat >> .ssh/authorized\_keys"
Configuring rsync #
Edit Rakefile in your octopress directory. Modify the following values.
ssh\_user       \= "[\[email protected\]](/cdn-cgi/l/email-protection)"
document\_root  \= "~/public\_html/"
rsync\_delete   \= true
deploy\_default \= "rsync"
Publishing the website #
If the configurations are set, you can run the following commands and publish the website. Enter your Ubuntu password on prompt.
rake generate \# Generates the static website files
rake deploy \# Uses rsync to send the files to the server
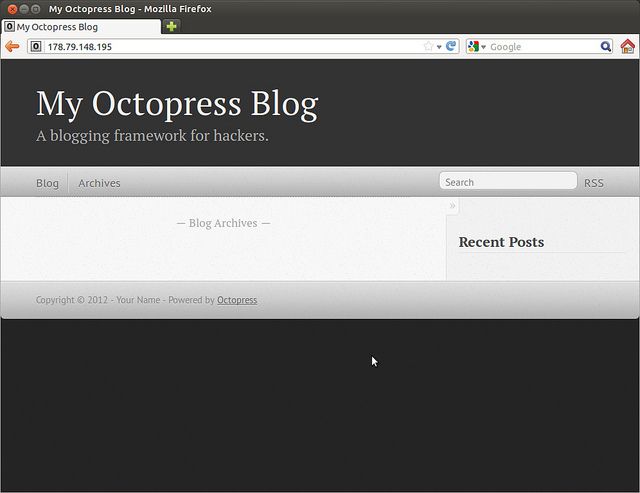
You should now get something like this at your public website.
Blogging #
Now you are ready to start blogging with Octopress.
Configurations #
Most important configurations can be found from the _config.yml. Just edit that and you can change all the default values like title and author to your own.
After changes just type the following commands and the site will be published.
rake generate \# Generates the static website files
rake deploy \# Uses rsync to send the files to the server
Posting with Octopress #
Create a new blog post with the following command. You need to be in the octopress directory to do this.
rake new\_post\["Name of your post"\]
Then you may go and edit it in source/_posts/ directory.
Again after you have written your post and want to publish it to the website, use these commands.
rake generate \# Generates the static website files
rake deploy \# Uses rsync to send the files to the server
Preview posts #
If you want to preview your posts before publishing, use only the rake generate and see the changes yourself with the command rake preview and head on to web browser and type in localhost:4000.
Documentation #
The official Octopress Documentation is a good place to find more information about posting and using different kind of plugins and code blocks in your blog.
If you need more information about Octopress, be sure to check it out for answers!